How to save battery on iPhone 12 mini, iPhone 12, iPhone 12 Pro, iPhone 12 Pro Max

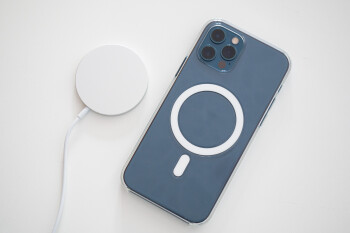
The iPhone 12 line is out now — from the tiny and cute iPhone 12 mini to the gargantuan iPhone 12 Pro Max. And while the Pro Max has plenty of room for a large battery, the iPhone 12 mini is not so fortunate. Even the iPhone 12 and 12 Pro have cells that are… less than what we would consider “big”.
iPhone 12 battery sizes
- 5.4″ Apple iPhone 12 mini battery: 2227 mAh
- 6.1″ Apple iPhone 12 battery: 2815 mAh
- 6.1″ Apple iPhone 12 Pro battery: 2815 mAh
- 6.7″ Apple iPhone 12 Pro Max battery: 3687 mAh
So, for the power-conscious among you, maybe you need to keep a set of tips on how to save those precious percentages for longer. Well, it’s your lucky day — we have those tips right here!
How to save battery on iOS
- Use Low Power Mode
- Fine-tune Background App Refresh
- Silence the notifications from non-essential apps
- Disable Raise to Wake
- Disable “Hey, Siri”
- Disable Location Services
- Use Dark Mode only (not applicable for iPhone SE, iPhone 11, iPhone XR)
- Go to manual brightness
- Disable 5G connectivity (iPhone 12 series only)
- Set up Account sync to “Fetch”
- Using Google Photos? Sync via Wi-Fi
- Disable Bluetooth for real
- Use wired headphones
- Enable AirPlane Mode when traveling
- Buy a battery case
Use Low Power Mode at all times
Obviously, this should be your go-to option at the very start. Low Power Mode tweaks things behind the curtains that we don’t even have user access to — like throttling processor performance, for example. Your iPhone 12 will prompt you to enable Low Power Mode when it hits 20%, but you can do it whenever you wish if you are anticipating a long day.

Fine-tune Background App Refresh

Silence non-essential notifications
Notifications on iOS have the nasty habit of lighting up your screen, which is admittedly useful — you can very quickly glance at the phone and see what just came in. But, in 2020, we have so, so many apps that constantly demand our attention… and they light our screen up every time they feel like it! And, it’s well-known that the screen is one of the biggest battery-drainers on any phone.
Go into Settings -> Notifications and disable the apps you don’t care for. The screen will stop lighting up for Reddit trending posts and your iPhone will get more battery to work with.


By doing this, you will still hear a notification sound whenever you get a new notification, but its message will not show up on your lock screen, ergo the screen won’t light up for every new emote or sticker in that group chat that you just refuse to leave.
Disable Raise to Wake
Here’s something that grinds my gears — if you have an iPhone in a wallet case, in a pocket, or in a purse or bag, it will still light up its screen if it senses a “lift up” motion. Competing smartphones usually use their proximity sensor to realize that “Hey, the screen is actually obstructed, so there’s no reason to light it up now”, but the iPhone is happy to glow even when enclosed behind the flap of a case.

Disable “Hey, Siri”
Yeah, it’s cool that Siri is always listening but what’s not cool is that she does take a small toll on the battery. So, if you don’t really find yourself talking to your digital assistant often, maybe just stop her from listening for the “Hey, Siri” phrase. This should save some extra battery on the iPhone. You can still call her up by holding the iPhone 12’s side button, so all is good.

Tune Location Services
GPS and location tagging drains battery – that’s not a shocker. And many apps need this — either for navigation, or actual location sharing. If you figure you are better off without Location Services entirely, go into Settings -> Privacy -> Location Services and turn the toggle at the top off.

This will disable the iPhone’s GPS and any form of location-based tracking until you turn it back on. Sure, this save iPhone battery, but it kind of obliterates a lot of smartphone functionality in the process.
Chances are you don’t want to nuke everything, as location features are useful and baked into the smartphone experience. Fine, the Location Services menu gives you quite a lot of control over what app — and when — can use your phone’s location. You can identify which apps may be potential battery drainers by looking for an arrow next to their names.

What do the arrows in Location Services mean?
- A black arrow means the app has gotten your location some time in the past 24 hours.
- A purple arrow means that an app has used Location Services very recently.
- A hollow arrow means that the app can access location only when something specific happens — time of day change, some kind of emergency, if the phone detects that you’ve left / entered an area, et cetera.
Choose the right location permission
- Always use Location Services (even in the background) — keep this on only for your navigation apps
- Only when using app option — this can be left on for camera apps (if you want to location-tag your pictures) or social media, if you want to be able to quickly tag your location in posts.
- Never is… well — never.

Location Services – System Services
At the bottom of the Location Services menu, you will find System Services. Now, these are a part of the core Apple experience, are light on the battery, and most of them are there to improve your experience. Still, you can disable some of them on your use case.
Apple Pay Merchant ID can stay on. You need it if you use Apple Pay and if you don’t — it will never fire off in the first place. Things like compass calibration, SOS, and Find my iPhone are — of course — essential. HomeKit you can turn off — unless you have a smarthome hub with HomeKit appliances set up, of course.

I generally recommend keeping Mobile Network Search and Networking & Wireless on. Basically, the phone will remember which connections work where, so it will very quickly and easily find cell signal or Wi-Fi. Presumably, it drains less battery that way instead of forcing the phone to constantly scan for signals as you move about.
Then you have toggles like Popular Near Me and Routing & Traffic, which I keep off because I use Google Maps anyway.
Use Dark Mode only

Disable 5G connectivity
Go to Settings -> Cellular -> Cellular Data Options, choose the Voice & Data option, tap on the LTE option to switch off the default 5G Auto mode.
Set account sync to “fetch”
There are three different methods by which your iPhone can get new mail, calendar events, contacts changes, notes, and app settings. What are the differences between fetch, push, and manual?
- Push – the new information becomes available on your iPhone as soon as possible
- Fetch – the iPhone actively scans for new information once every x amount of minutes
- Manual – the iPhone only looks for new information when an app that uses it is opened
Naturally, push drains the most battery as it keeps the phone “listening” constantly. Fetch is a good compromise, as you can set it to 60-minute intervals. And manual is the “save the most power” option as it will only download new items when the respective app is open.
This also helps save a little bit of battery on iPhone. But hey, every little bit helps, right? So, set up Fetch in the following manner:


Using Google Photos?
Google Photos managed to attract a ton of users by offering free cloud storage to back up photos. Heads up: the well is dry and Google is about to cut the free backup option come next year. In any case, if you are still using Google Photos, make sure you have the app set up to only sync via Wi-Fi. First — because Wi-Fi drains less battery than mobile data, and secondly — because being on Wi-Fi probably also means you are near a power outlet.


Disable Bluetooth on iPhone

Use wired headphones

Wireless earphones are incredibly convenient, I agree. But the iPhone does need a bit more juice to transmit music over Bluetooth. I am not telling you to all out throw your AirPods in the bin. But, if you are planning a long commute or any type of activity where you won’t be seeing a power outlet for a while, consider using wired earphones. A wire reqiures less strain and saves some extra iPhone battery. You will need the Lightning-to-headphones dongle or you can just use Lightning-equipped EarPods or Beats headphones.
Use Airplane Mode when out of reception areas
Again — when commuting, on a train, long roadtrip, or a hike, you will probably be weaving in and out of reception areas. Having to constantly scan for cell towers and hooking up to them will drain your iPhone 12 mini’s battery before you can say “MagSafe is cool!”. So, when on the road, enable Airplane Mode to save some iPhone power.

Do make sure you’ve downloaded your route beforehand, if you’re using navigation.
Once you’ve stopped and are set up in a location, disable Airplane Mode to look for a signal.
Go to Manual brightness

Buy a battery case
Yes, I know — duh! But if all else fails, you may want to consider one of those bulky and funny-looking battery cases. They aren’t exactly elegant, but if you are on the road a lot, they will be invaluable in keeping your iPhone 12 alive for longer.

Source: Phonearena

Comments